
Showing posts with label sewing. Show all posts
Showing posts with label sewing. Show all posts
Friday, September 30, 2011
Baseball Burp Rags
My machine has been collecting dust, along with the rest of my house, these days. But I finally felt good enough to finish an order for a friend. How cute is this fabric? We didn't really do a themed nursery, but maybe we will this next time around. For the tutorial, see this post.


Thursday, September 1, 2011
Embroidered Burp Clothes tutorial
It's that time of year: Baby showers and Christmas gifts. This is a quick and classy way to jazz up those everyday burp clothes. Here's what I did:
 Pick some adorable fabrics that you think the gift receiver will enjoy. I made these for a lady in my husband's shop who did her daughter's nursery in very bright colors.

Take the edges and pin them, ironing the seams to make them easier to sew.
 Lay them on top of the burp cloth, right down the middle. I used Gerber prefolds, which aren't absorbent enough to use as cloth diapers but work great to wiping up all those other baby messes. Pin them down and you're ready to sew.
 Choose a zigzag stitch and make sure that your needle and stitch goes through the fabric and over the seam into the burp cloth.
 I attached my quilting foot and embroidery attachment and added the Baby Girl's initials to some of the clothes. If you don't have an embroidery attachment, you can choose your button hole stitch and you can free hand it. It won't be as neat as a machine embroider (unless you have a steady hand, and I do not) but it still adds a very personal touch.
 This is the finished product! You can make as many or few as you want. I added a little ribbon to the bundle and you're ready to give a personalized gift.


Take the edges and pin them, ironing the seams to make them easier to sew.


Monday, August 15, 2011
Quilted Bib
I found an adorable tutorial for a quilted bib from Sew She Sews. I did a little tester, since I like to try out a pattern before I make one to give to someone else. Turns out you should REALLY follow the ironing and notching steps. I skipped them because it was late and I was ready to go to bed, but they are really important. Here's my final product:
 Here is an action shot. My Wild Child loves himself some applesauce:
 And here is the mess I made in my "sewing area," which is my kitchen during the non-naptime hours.\
 What are you sewing these days?


Sunday, August 14, 2011
Trashy tutorial
My car is a mess and a half right now. A day of errands usually ends with receipts and gum wrappers and snack bags all over the seats. I decided to make this handy little trash can for my car and with the help of a secret weapon is stays open all the time, for easy one-handed trashing. Here's what you need:


 Then you'll want to layer your solid fabric and your patterned fabric wrong sides together. Pin them right down the middle and at the bottom, making a little sack with an opening at the top. You should have about an inch or two of fabric left at the top of your solid fabric - this is for the rim.

Sew your seams. These are just easy cheesy straight lines. It doesn't matter if they are perfect, because you can trim them and you're going to flip the whole thing rightside out when you're finished. Flip your bag out and pin the extra fabric for your rim over. Iron it so it stays, but don't stitch it down yet. Take your fabric strips for your handles and attach them in the back, under the rim.

 Sew a straight stitch across the back of your bag along the rim, securing the straps. You will want to back stitch to make sure that you have a little extra reinforcement. Now you can add the pipe cleaner. This is just sturdy enough that the bag will stay open all the time. Slip it under the front bit of the fabric rim and sew around the front.


 And you're done! You can add velcro on the end of your straps and shorten them for a perfect fit, but I left mine long so I can just tie them to the back of the head rest. Trim up your threads and go find an old produce bag and you're on your way to a more tidy car. This is what it looks like when you're all done.

2 pieces of fabric (print and coordinating) for the body
2 pieces of fabric for the straps
1 4"x4" square for your applique
My print fabric measured 10"x10" and my coordinating measured 12"x10" so I could make a little rim. My straps were about a foot long and 3 inches wide.
Pins
Rotary cutter/scissors
WonderUnder (or another fabric fusing material)
Pipe cleaner

The first thing is to make your applique. Follow the directions on the package of WonderUnder and cut out your design. I made a little trashcan, for obvious reasons.

After you cut our your applique, iron it onto the center of your patterned fabric. Then stitch around it using a straight stitch. You can add a little detail, like I did, if you want.


Sew your seams. These are just easy cheesy straight lines. It doesn't matter if they are perfect, because you can trim them and you're going to flip the whole thing rightside out when you're finished.


Friday, July 29, 2011
Crayon roll-up
A few weeks ago I went with a friend to get some discount fabric. I ended up buying a few cute patterns with no real plan for them, so I decided to make Wild Child a crayon roll. He's just learning to hold a crayon (without putting it in his mouth, of course) and this little roll-up is easy to carry and would make a cute gift. I used a tutorial from Pleated Poppy, so I'll send you her way for the step by step. Here's the finished product!


Tuesday, July 26, 2011
Sew what?
I understand how people can become "professional" bloggers. Who has the time to update everyday with thought-provoking content or striking visual pictures? I didn't even get a shower yesterday. Now, if you made this my job I probably could make the time. That doesn't mean I haven't been working the foot of my sewing machine lately. Nothing too fancy, just some practical things that needed to be done. Now that all the necessaries have been completed the Christmas sewing can commence. Bring it on.
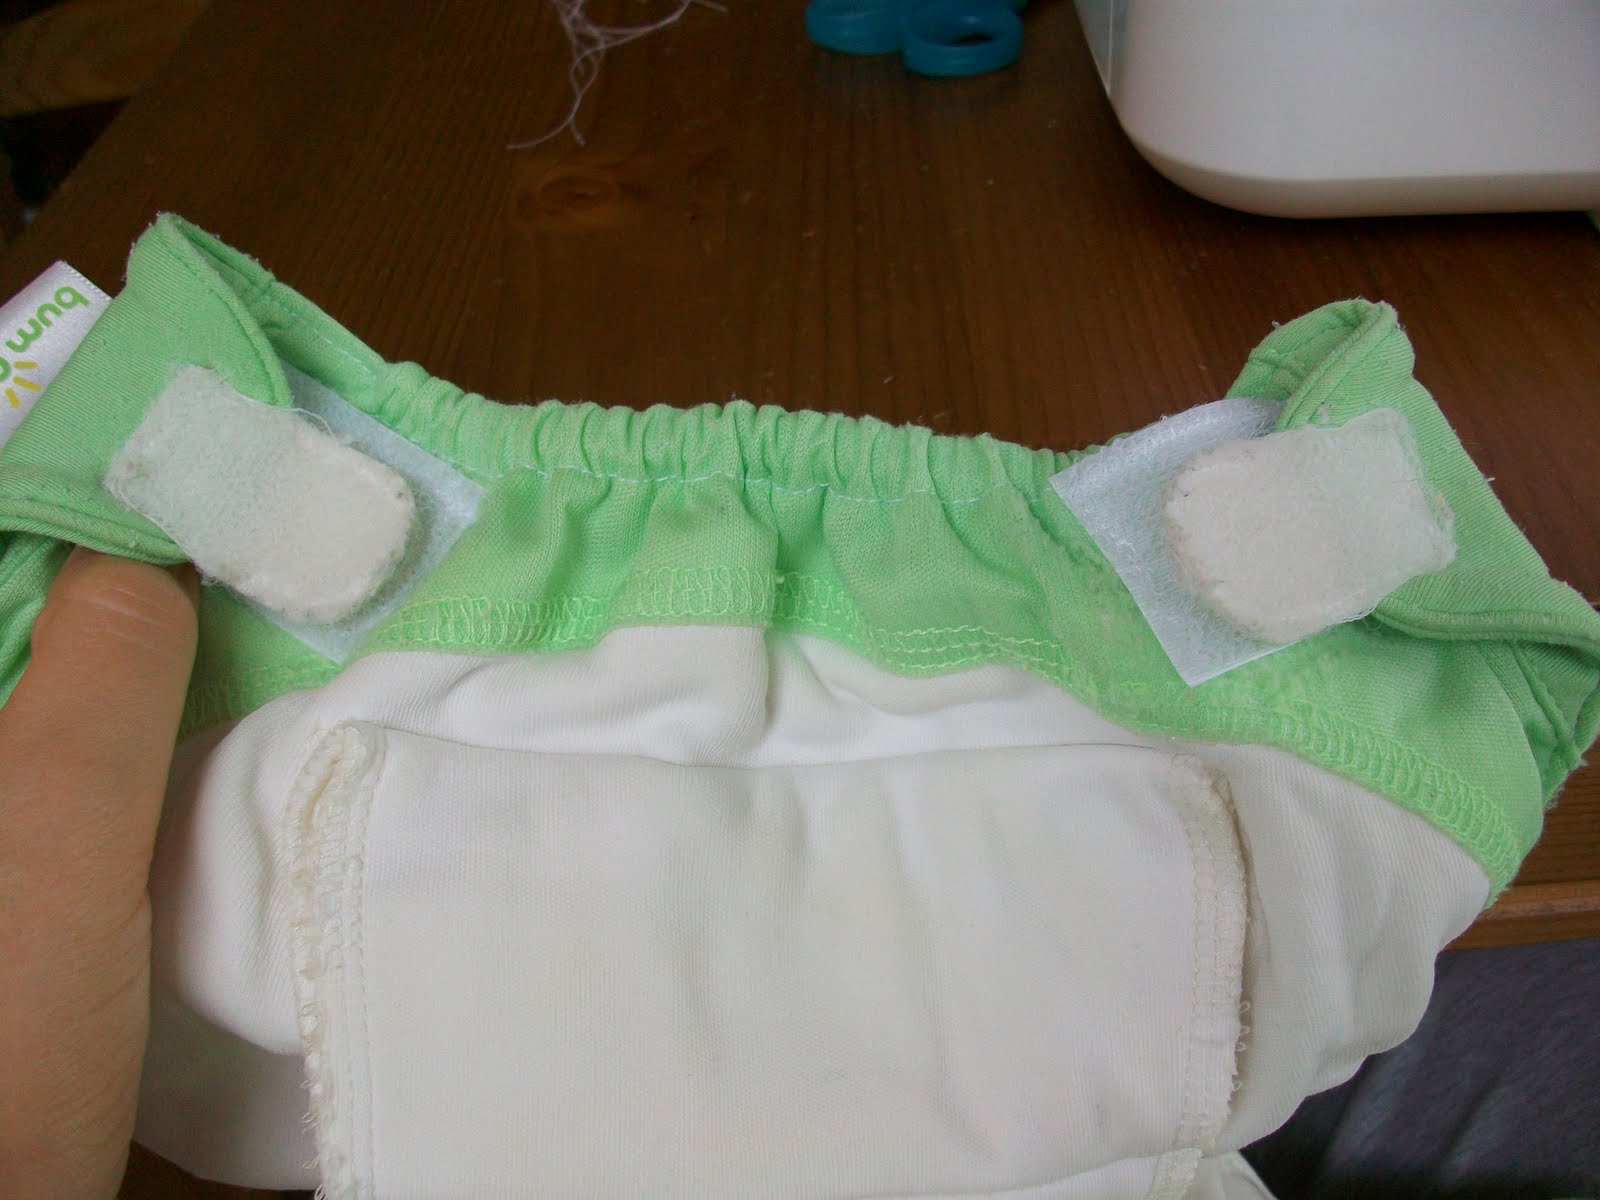
Practical fix - I got a used cloth diaper that had some well-loved tabs. I did a quick replace and it's almost good as new!
Crummy little tab:


Good as new!

And because I was on a cloth diapering theme the other day, I put together some more cloth diaper wipes. Flannel on one side and wash cloth on the other. You'll need a dozen squares of flannel and wash cloth of your choice cut into 4"x4" squares. I did a cute little dino theme for the Wild Child.
 Sew the flannel and cloth wrong side together, leaving one side open to turn.
 Turn them right side out and then fold the edges of the open side in and top stitch them closed.
 Done! You can do a top stitch around all the sides if you want, but it's not necessary.
Practical sewing project number three - A sunglasses case for myself. I sort of threw it together because I needed something to stick in my purse, so there's no tutorial or anything. I'm happy with how it ended up, but I will probably need to add a clasp or some sort of closure so the glasses don't fall out. Hopefully I'll remember to document the next one I do!
 Here's the little detail on the glasses:

Practical fix - I got a used cloth diaper that had some well-loved tabs. I did a quick replace and it's almost good as new!
Crummy little tab:

Do a quick sew - no need to remove the old tab, just sew fresh velcro over:

And because I was on a cloth diapering theme the other day, I put together some more cloth diaper wipes. Flannel on one side and wash cloth on the other. You'll need a dozen squares of flannel and wash cloth of your choice cut into 4"x4" squares. I did a cute little dino theme for the Wild Child.


Practical sewing project number three - A sunglasses case for myself. I sort of threw it together because I needed something to stick in my purse, so there's no tutorial or anything. I'm happy with how it ended up, but I will probably need to add a clasp or some sort of closure so the glasses don't fall out. Hopefully I'll remember to document the next one I do!


Subscribe to:
Posts (Atom)